Jump to content

Academy V1.2 - Course Based Learning Management System


Recommended Posts

  • Administrators

Exclusive on Donia WeB

Academy - Course Based Learning Management System - CodeCanyon Item for Sale

What is ‘ACADEMY’

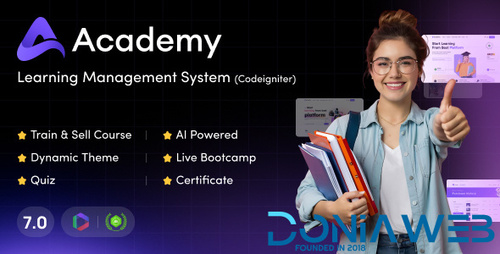
ACADEMY is a marketplace script for online learning. Here students and teachers are combined together for sharing knowledge through a structured course based system. Teachers or instructors can create unlimited number of courses, upload videos and documents according to their expertise and students can enroll to these courses and make themselves skilled anytime and from anywhere.
So start selling your courses by installing ACADEMY and make your online business today. 
It is a UDEMY clone!

Quick start guide for course instructor/admin

  • Read all our provided documentation carefully before using the software
  • Install the application following “Installation and Update” guide carefully
  • Login as site administrator to organize your system
  • At first update your System Settings and Payment Settings from Settings option of the left sidebar menu. Also make sure to provide a valid YouTube API key and a valid Vimeo API key on System Settings.
  • If you have updated the Settings successfully, you can go to Categories option from the same left side bar menu and create Categories.
  • After creating Category, you can create Sub-categories under a specific Category. For creating Sub-categories you can go to Categories page, select a specific category, click on Action dropdown menu and select Manage Sub-categories. It will take you to the Sub-categories page. Now you can simply click on “+Add Sub Category” button and fill all the required fields to create a Sub-category.
  • Now its time to create some Courses. Since a course will contain all the video lessons you have to create it carefully. Move to Courses option from the left menu, You will get a “Add Course Form” after clicking on “+Add Course” button. Fill all the fields carefully
  • Every Course should have at least one Section. Because at the end you will have to add a lesson under a specific section of a specific course. So, now you will have to create at least one section. Move to Courses page, select a specific course, click on action dropdown menu and select Manage Section. After clicking on Manage Section you will get the list of Section which is empty now. You have to create one by clicking the “+Add Section” button
  • As you have created a Course and a section or multiple sections, now you will be able to create a lesson. Now lets move to the Course page again, select a specific course, click on Action dropdown button, select Manage Lesson. It will also show the list of lessons that you’ve created. To add new you can just click on “+Add Lesson” button

Quick start guide for course students

  • Since the application has been already installed. Student can access the website by simply hitting the application URL
  • Home page will appear every time a student hits the url. From the home page a student can search for a specific course, get all the top courses, top ten latest courses, get category based courses. A student can sign up if he/she is not registered yet. If a student is already registered he/she can log in. Student can add courses on their Shopping Carts or add them on their Wishlists
  • Student can see the course details by simply clicking on a course thumbnail. Course details page contains all the essentials information about a course like, Title, Description, Outcomes, The prerequisites of the course, Lesson list Instructor details and the rating and reviews. User can see a course overview here
  • If Student want to buy course they must add those courses on their cart
  • After adding a course on Shopping cart if a student wants to see their cart items, they can to go to the Shopping Cart page by clicking on Go To Cart button, which appears on hovering over the cart icon of the header
  • Student can remove courses if they want from the shopping cart page
  • On the right side of the shopping cart page is the total price of the cart items. Under that is the Checkout button. If student want to checkout they can simply click on the Checkout button and pay for those courses
  • After a successful checking out student can see their courses on the My Courses menu. Student will get the My Courses button by hovering over their profile image from the header
  • My Courses page will show all the courses which is purchased by that student. Student can play the lessons by clicking on the thumbnail from the My Courses page

Update Log

version 1.2 – January, 2019

* Lesson file type added : text, pdf, doc, own server video
* Description field for all course lessons
* Video player updated and enhanced 
* Added course title/summary to course playing page
* Course activation notification updated.
* Site title issue fixed
* Seo settings for course pages
* Added currency settings

Demo: https://codecanyon.net/item/academy-course-based-learning-management-system/22703468

doniaweb.com_academy-course-based-learning-management-system_4.zip

  • Like 4
  • Love 2
  • Thanks 4

Support is available for paid files only
Support for free files is offered for a fee only

6 hours ago, Mahmoud said:

Exclusive on Donia WeB

Academy - Course Based Learning Management System - CodeCanyon Item for Sale

What is ‘ACADEMY’

ACADEMY is a marketplace script for online learning. Here students and teachers are combined together for sharing knowledge through a structured course based system. Teachers or instructors can create unlimited number of courses, upload videos and documents according to their expertise and students can enroll to these courses and make themselves skilled anytime and from anywhere.
So start selling your courses by installing ACADEMY and make your online business today. 
It is a UDEMY clone!

Quick start guide for course instructor/admin

  • Read all our provided documentation carefully before using the software
  • Install the application following “Installation and Update” guide carefully
  • Login as site administrator to organize your system
  • At first update your System Settings and Payment Settings from Settings option of the left sidebar menu. Also make sure to provide a valid YouTube API key and a valid Vimeo API key on System Settings.
  • If you have updated the Settings successfully, you can go to Categories option from the same left side bar menu and create Categories.
  • After creating Category, you can create Sub-categories under a specific Category. For creating Sub-categories you can go to Categories page, select a specific category, click on Action dropdown menu and select Manage Sub-categories. It will take you to the Sub-categories page. Now you can simply click on “+Add Sub Category” button and fill all the required fields to create a Sub-category.
  • Now its time to create some Courses. Since a course will contain all the video lessons you have to create it carefully. Move to Courses option from the left menu, You will get a “Add Course Form” after clicking on “+Add Course” button. Fill all the fields carefully
  • Every Course should have at least one Section. Because at the end you will have to add a lesson under a specific section of a specific course. So, now you will have to create at least one section. Move to Courses page, select a specific course, click on action dropdown menu and select Manage Section. After clicking on Manage Section you will get the list of Section which is empty now. You have to create one by clicking the “+Add Section” button
  • As you have created a Course and a section or multiple sections, now you will be able to create a lesson. Now lets move to the Course page again, select a specific course, click on Action dropdown button, select Manage Lesson. It will also show the list of lessons that you’ve created. To add new you can just click on “+Add Lesson” button

Quick start guide for course students

  • Since the application has been already installed. Student can access the website by simply hitting the application URL
  • Home page will appear every time a student hits the url. From the home page a student can search for a specific course, get all the top courses, top ten latest courses, get category based courses. A student can sign up if he/she is not registered yet. If a student is already registered he/she can log in. Student can add courses on their Shopping Carts or add them on their Wishlists
  • Student can see the course details by simply clicking on a course thumbnail. Course details page contains all the essentials information about a course like, Title, Description, Outcomes, The prerequisites of the course, Lesson list Instructor details and the rating and reviews. User can see a course overview here
  • If Student want to buy course they must add those courses on their cart
  • After adding a course on Shopping cart if a student wants to see their cart items, they can to go to the Shopping Cart page by clicking on Go To Cart button, which appears on hovering over the cart icon of the header
  • Student can remove courses if they want from the shopping cart page
  • On the right side of the shopping cart page is the total price of the cart items. Under that is the Checkout button. If student want to checkout they can simply click on the Checkout button and pay for those courses
  • After a successful checking out student can see their courses on the My Courses menu. Student will get the My Courses button by hovering over their profile image from the header
  • My Courses page will show all the courses which is purchased by that student. Student can play the lessons by clicking on the thumbnail from the My Courses page

Update Log

version 1.2 – January, 2019


* Lesson file type added : text, pdf, doc, own server video
* Description field for all course lessons
* Video player updated and enhanced 
* Added course title/summary to course playing page
* Course activation notification updated.
* Site title issue fixed
* Seo settings for course pages
* Added currency settings

Demo: https://codecanyon.net/item/academy-course-based-learning-management-system/22703468


Hidden Content

  • Give reaction or reply to this topic to see the hidden content.


Edited by Raj Kumar
  • Like 1
  • Love 2
  • Sad 1
  • 3 months later...
  • 2 months later...
  • 4 weeks later...
  • 4 months later...

Join the conversation

You can post now and register later. If you have an account, sign in now to post with your account.
Note: Your post will require moderator approval before it will be visible.

Guest
Unfortunately, your content contains terms that we do not allow. Please edit your content to remove the highlighted words below.
Reply to this topic...

×   Pasted as rich text.   Paste as plain text instead

  Only 75 emoji are allowed.

×   Your link has been automatically embedded.   Display as a link instead

×   Your previous content has been restored.   Clear editor

×   You cannot paste images directly. Upload or insert images from URL.

×
  • Create New...